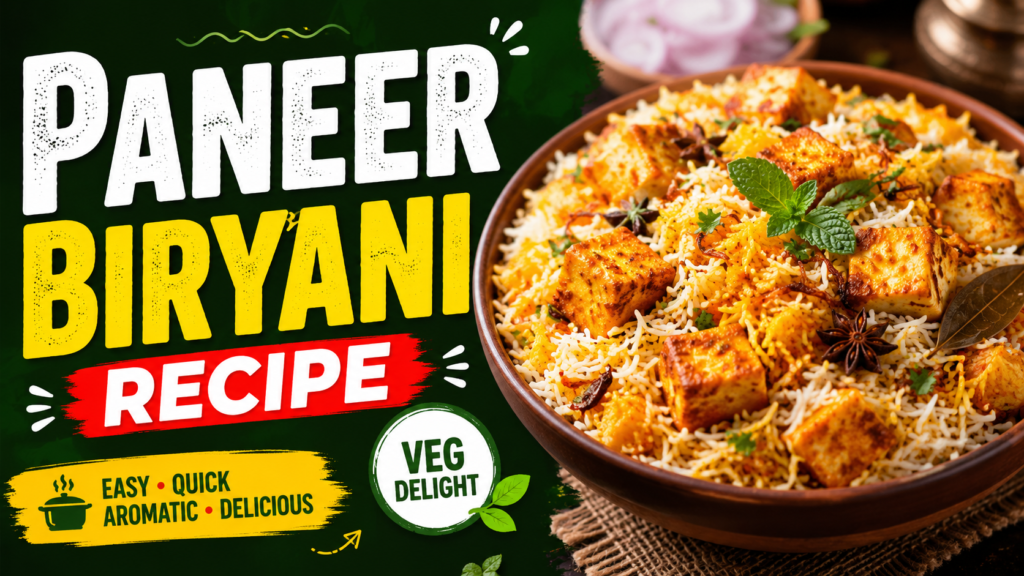
Paneer Biryani Recipe – Aromatic, Flavorful & Easy to Make at Home
By Kaushik Brahmakshatriya
Published On 10 May 2026.
Paneer Biryani Recipe
Demo heading
Demo test
Hello
If you love biryani but prefer a vegetarian version, Paneer Biryani is the answer to all your cravings. This classic Indian rice dish combines soft, golden-fried paneer cubes with fragrant basmati rice, whole spices, and a rich, layered marinade — making it a showstopper at any dinner table. Whether it’s a weekend family meal, a festive occasion, or a dinner party, this recipe never disappoints.
Let’s walk you through everything you need to know to make restaurant-style Paneer Biryani right in your own kitchen.
Why You’ll Love This Paneer Biryani
Unlike many biryani recipes that rely on meat, this vegetarian version is lighter yet equally satisfying. The paneer soaks up the marinade beautifully, and the dum-cooking technique locks in all the flavors. You don’t need a tandoor or a professional kitchen — just a heavy-bottomed pot and some patience.
Ingredients for Paneer Biryani
For the Rice:
* 2 cups basmati rice (soaked for 30 minutes)
* 4 cups water
* 1 bay leaf, 2 cloves,2 cardamom pods,1-inch cinnamon stick
* 1 tsp salt
* 1 tsp ghee
For the Paneer Marinade:
* 250g paneer (cubed)
* ½ cup thick curd (yogurt)
* 1 tsp ginger-garlic paste
* 1 tsp red chilli powder
* ½ tsp turmeric
* 1 tsp garam masala
* 1 tsp biryani masalaSalt to taste
* 1 tbsp oil
For the Biryani Layers:
* 2 medium onions (thinly sliced, fried golden)
* 2 tbsp ghee
* Fresh mint and coriander leaves
* A pinch of saffron soaked in 3 tbsp warm milk
* 1 tsp rose water (optional)
Quick Reference – Paneer Biryani at a Glance
| Detail | Info |
| Cuisine | Indian |
| Dish Type | Main Course |
| Prep Time | 20 minutes |
| Cook Time | 40 minutes |
| Total Time | 60 minutes |
| Servings | 4 |
| Difficulty Level | Medium |
| Diet Type | Vegetarian |
| Best Served With | Raita, Salad, Papad |
| Shelf Life | 1–2 days (refrigerated) |
Step-by-Step Method
Step 1: Marinate the Paneer
Combine all marinade ingredients in a bowl. Add paneer cubes and mix gently. Let it rest for at least 20–30 minutes. If time allows, marinate for 1 hour for deeper flavor.
Step 2: Cook the Basmati Rice
Boil water with whole spices, salt, and ghee. Add soaked basmati rice and cook until it is 70–75% done (the rice should still have a slight bite). Drain and set aside. This step is critical — overcooked rice will turn mushy during dum.
Step 3: Cook the Marinated Paneer
Heat oil in a pan. Lightly sauté or pan-fry the marinated paneer for 4–5 minutes until it develops a slight golden color. Remove and keep aside.
Step 4: Layer the Biryani
In a heavy-bottomed pot or Dutch oven, start with a base layer of partially cooked rice. Add the cooked paneer on top, followed by fried onions, fresh mint, coriander, and a drizzle of saffron milk. Add another layer of rice and top with ghee, remaining saffron milk, and rose water.
Step 5: Dum Cooking
Seal the pot with a tight-fitting lid or use dough to seal the edges. Cook on low heat for 20–25 minutes. This slow steam method is what gives biryani its iconic aroma and perfectly cooked texture.
Step 6: Serve
Gently fluff the biryani with a fork. Serve hot with cucumber raita, onion salad, or a side of papad.
Pro Tips for the Best Paneer Biryani
* Always use aged basmati rice — it stays separate after cooking and gives long, fluffy grains.
* Don’t skip the marinade time — paneer absorbs spices slowly; more time means better flavor.
* Fried onions are non-negotiable — they add sweetness and texture to every layer.
* Low flame is the key to dum — high heat will burn the bottom before the steam can do its job.
* Add a drop of lemon juice to the boiling rice water to keep grains white and non-sticky.
Nutritional Overview (Per Serving – Approximate)
| Nutrient | Amount |
| Calories | ~420 kcal |
| Protein | 14g |
| Carbohydrates | 52g |
| Fat | 16g |
| Fiber | 3g |
| Calcium | ~180mg |
Values are approximate and may vary based on ingredient quantities used.
Frequently Asked Questions (FAQ)
Q1. Can I make Paneer Biryani without dum cooking?
Yes, you can. After layering, cover the pot tightly with a lid and cook on very low heat for 20 minutes. While the traditional dum technique using sealed dough edges gives the best aroma, a heavy lid on a low flame works well for home cooking.
Q2. What type of rice is best for Paneer Biryani?
Long-grain aged basmati rice is the best choice for biryani. It stays firm, non-sticky, and absorbs flavors without breaking down. Avoid short-grain or regular rice, as they tend to become mushy during dum cooking.
Q3. Can I use store-bought biryani masala for this recipe?
Absolutely. Store-bought biryani masala is a great time-saver and works well in this recipe. Brands like Everest, MDH, or Shaan are popular choices in Indian kitchens. You can also make your own by dry-roasting and grinding whole spices.
Q4. How do I keep paneer soft in biryani?
The secret to soft paneer is not overcooking it. Lightly sauté the marinated paneer just enough to seal the marinade — around 4–5 minutes. The dum process will continue cooking it gently. Also, soaking raw paneer in warm salted water for 10 minutes before marinating helps retain its softness.
Q5. Can Paneer Biryani be made ahead of time?
Yes, Paneer Biryani keeps well in the refrigerator for up to 2 days when stored in an airtight container. Reheat it on a low flame with a sprinkle of water, or microwave it covered for 2–3 minutes. The flavors actually deepen overnight, making it taste even better the next day.
