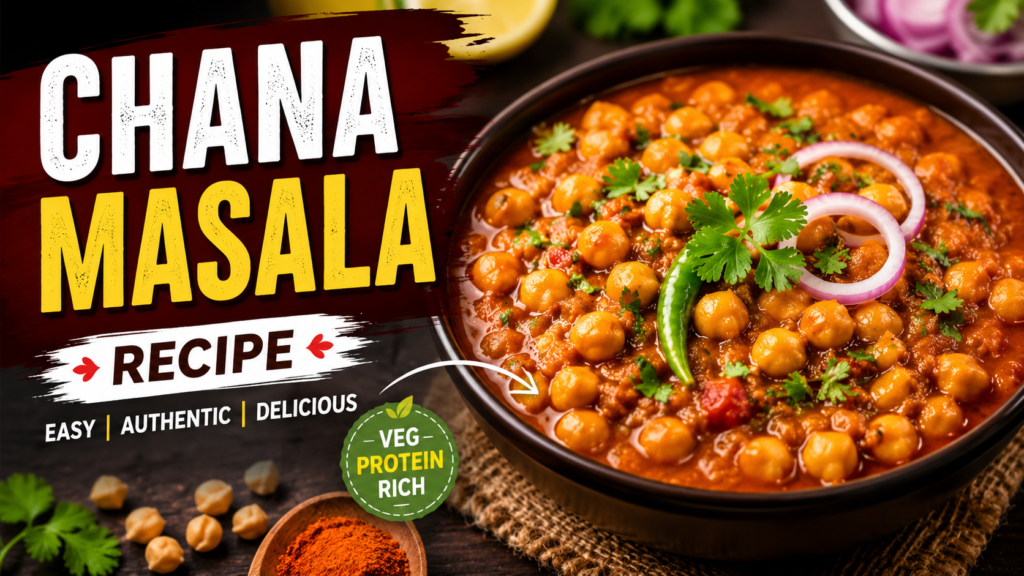
Chana Masala Recipe – The Only Guide You’ll Ever Need for Bold, Homemade Chickpea Curry
By Kaushik Brahmakshatriya
Published On 15 May 2026.
Chana Masala Recipe
There’s something magical about the smell of cumin crackling in hot oil. Add onions, let them caramelise slowly, toss in some ginger-garlic, and the moment tomatoes hit that pan — your entire kitchen transforms. That’s exactly what happens every single time you start making Chana Masala at home.
This isn’t just another recipe you follow mechanically. This is a dish that rewards patience. The kind of curry that makes people pause mid-bite and ask, “Did you actually make this yourself?
“Let’s walk through it — the right way.
Why Chana Masala Deserves a Permanent Spot in Your Kitchen
Most people think of Chana Masala as a street food item or something reserved for Sundays at a dhaba. But the truth is, it’s one of the most practical dishes you can cook on any weekday evening.
Chickpeas are inexpensive, filling, and loaded with plant protein. The spices you need are probably already sitting in your masala dabba. And the cooking process, while it has a few stages, is mostly hands-off once the gravy gets going. For a dish this flavourful, the effort-to-reward ratio is remarkably generous.
Ingredients You’ll Need
Ingredient List with Quantities and Role
| Ingredient | Quantity | What It Does in the Dish |
| White chickpeas (soaked overnight) | 1.5 cups | Protein base; absorbs spices beautifully |
| Onion (finely sliced)2 large | 2 large | Builds the sweet, caramelised gravy foundation |
| Ripe tomatoes (roughly chopped) | 3 medium | Adds body, tang, and natural colour |
| Ginger-garlic paste | 1 tbsp | Creates aromatic depth early in cooking |
| Cumin seeds | 1 tsp | First layer of flavour in the tempering |
| Black cardamom (badi elaichi) | 1 pod | Adds smoky undertone unique to Punjabi-style chole |
| Bay leaf1 | 1 | Subtle background warmth |
| Chole masala powder | 2 tsp | The heart of the spice profile |
| Kashmiri red chili powder | 1 tsp | Colour without excessive heat |
| Coriander powder | 1 tsp | Earthy, rounded body to the gravy |
| Dry mango powder (amchur) | ½ tsp | That signature tangy punch at the finish |
| Kasuri methi (dried fenugreek) | ½ tsp | Subtle bitterness that balances richness |
| Oil | 2 tbsp | Cooking base |
| Salt | To taste | Seasoning at every stage |
| Fresh coriander + ginger juliennes | For garnish | Freshness and visual appeal |
Before You Start: The Chickpea Prep Nobody Talks About Enough
Most recipe failures with Chana Masala happen before the cooking even begins — because the chickpeas weren’t prepared properly.
Soak your chickpeas in cold water for a minimum of 8 hours. Overnight is ideal. They should almost double in size after soaking. When you press one between your fingers before cooking, it should yield without much resistance.
Pressure cooker method: Add soaked chickpeas with 3 cups fresh water, ½ tsp salt, and one black tea bag (this deepens the colour naturally). Cook for 4–5 whistles on medium flame. Let the pressure drop on its own. The chickpeas should be completely tender but still holding their shape — not mushy.
Reserve the cooking liquid. That starchy, flavoured water will go straight into your gravy later and elevate the entire dish
How to Cook the Perfect Chana Masala
Stage 1 — Build the Base Slowly
Set a heavy kadai or wide pan on medium flame. Add oil and let it heat until you see a faint shimmer. Drop in the cumin seeds and black cardamom. The moment the cumin starts to darken at the edges — about 30 seconds — add your sliced onions along with the bay leaf.
This step cannot be rushed. Cook the onions on medium-low heat for a full 10 to 12 minutes, stirring occasionally. You’re looking for deep golden-brown colour, not just translucency. The caramelisation happening here is what gives your Chana Masala that restaurant-depth of flavour that a quick sauté can never achieve.
Add the ginger-garlic paste now. Stir it through and cook for 2 minutes until the raw smell completely disappears and the paste starts sticking lightly to the pan.
Stage 2 — The Tomato Masala
Add the chopped tomatoes, increase heat slightly to medium, and stir everything together. Season with a little salt at this stage — it helps the tomatoes break down faster.
Cook the tomato mixture until the tomatoes completely dissolve into the onion base and oil visibly separates around the edges of the pan. This takes 6 to 8 minutes and cannot be skipped. Undercooked tomatoes leave a raw, acidic taste that no amount of spice can fix.
Now add your spices — chole masala powder, Kashmiri red chili, and coriander powder. Lower the flame and cook the spiced masala for 3 to 4 minutes, stirring constantly. The masala should look deep, almost paste-like, and fragrant.
Stage 3 — Bringing the Chickpeas In
Add the boiled chickpeas directly into the masala and fold them through gently so every chickpea gets coated. Add 1 cup of the reserved chickpea cooking liquid (or plain water if you don’t have it).
Take a spoon and lightly mash 4 to 5 chickpeas against the side of the pan. This simple trick thickens the gravy organically — no cornstarch, no extra flour, just the chickpea’s own starch doing its job.
Bring everything to a boil, then reduce heat to low and simmer with the lid slightly ajar for 12 to 15 minutes. The gravy will thicken, deepen in colour, and develop a rich, clingy consistency.
Stage 4 — The Final Flavour Layer
Turn off the flame. Add amchur powder and crumble in the kasuri methi between your palms before adding it — this releases the oils and intensifies the flavour. Stir once and let the residual heat do the rest.
Taste for salt. Adjust. Garnish with a generous handful of fresh coriander leaves and a few thin ginger juliennes on top.Your Chana Masala is ready.
Nutritional Value Per Serving
Nutrition Breakdown (Approximate, Per Serving)
| Nutrient | Per Serving (~1 bowl) | % Daily Value (approx.) |
| Calories | 285 kcal | 14% |
| Protein | 13.5g | 27% |
| Total Carbohydrates | 40g | 15% |
| Dietary Fibre | 10.5g | 42% |
| Folate | 210mcg | 53% |
| Total Fat | 7.5g | 10% |
| Iron | 4.8mg | 53% |
| Potassium | 480mg | 14% |
| Vitamin C | 16mg | 18% |
Chickpeas are among the richest plant sources of folate and iron — making Chana Masala a genuinely nutritious choice, not just a satisfying on
Cooking Timeline at a Glance
Time Breakdown by Stage
| Cooking Stage | Time Needed | Key Indicator of Readiness |
| Soaking chickpeas | 8 hours (overnight | Doubled in size, soft to press |
| Pressure cooking | 15–18 minutes | Tender but shape intact |
| Caramelising onions | 10–12 minutes | Deep golden-brown colour |
| Cooking tomato masala | 10–12 minutes | Oil separating at pan edges |
| Simmering with chickpeas | 12–15 minutes | Thick, clingy gravy |
| Finishing and garnish | 3–4 minutes | Fragrant, balanced taste |
| Total Active Time | ~40 minutes | Rich colour, bold aroma |
What to Serve It With
Chana Masala works brilliantly across a range of pairings depending on your mood and occasion.
For a classic street-food experience, pair it with fluffy bhatura — the combination of Chole Bhature is practically legendary across North India. On quieter evenings, a bowl of Chana Masala alongside jeera rice feels like genuine comfort food.It also pairs well with laccha paratha, kulche, or even simple steamed rice with a wedge of lemon squeezed over the top.
If you’re watching calories, a smaller portion with two whole wheat rotis works wonderfully without sacrificing any of the flavour.
Frequently Asked Questions
Q1. My Chana Masala gravy is too thin. How do I fix it?
Scoop out 4 to 5 cooked chickpeas into a small bowl, mash them to a smooth paste with a spoon, and stir that paste back into the curry. Simmer uncovered on low heat for 5 more minutes. The gravy will tighten naturally without adding anything artificial.
Q2. Can I use canned chickpeas instead of dried ones?
Yes, you can. Drain and rinse two standard 400g cans of chickpeas. Skip the soaking and boiling stages entirely and add them directly at the masala stage. Reduce the simmer time to 8 minutes since canned chickpeas are already soft. The flavour will be slightly milder, but the dish still works well.
Q3. What makes Chana Masala different from regular dal?
Dal is made from split lentils and has a much smoother, thinner texture. Chana Masala uses whole chickpeas in a thick, spiced tomato gravy. The spice profile is also bolder — heavier on whole spices, tangier from amchur, and richer from the caramelised onion base.
Q4. Is Chana Masala suitable for people managing blood sugar?
Chickpeas have a relatively low glycemic index compared to many other carbohydrate sources, and the high fibre content helps slow glucose absorption. However, if you are managing a specific health condition, always consult your doctor or a registered dietitian for personalised guidance before making dietary changes.
Q5. How long does homemade Chana Masala stay good in the fridge?
Stored in a clean, airtight container, Chana Masala keeps well in the refrigerator for 3 to 4 days. The flavour actually deepens by day two as the spices continue to develop. Reheat in a pan over low flame with a splash of water to loosen the gravy. For longer storage, freeze it in portions for up to 3 weeks.
Q6. Can I make Chana Masala without chole masala powder?
Absolutely. Combine 1 tsp garam masala, ½ tsp cumin powder, ¼ tsp black pepper, ¼ tsp anardana (pomegranate seed) powder, and a very small pinch of black cardamom powder. This homemade blend comes close to the flavour profile of packaged chole masala and works surprisingly well in a pinch.
One Last Thing Before You Cook
The difference between Chana Masala that’s merely good and Chana Masala that’s genuinely unforgettable comes down to two things: how long you caramelise the onions and whether you let the tomato masala cook until the oil separates properly. Rush either of those steps, and you’ll taste the shortcut.Take your time with them. The rest of the dish falls into place beautifully on its own.
